How to use Custom Tags in Nectus
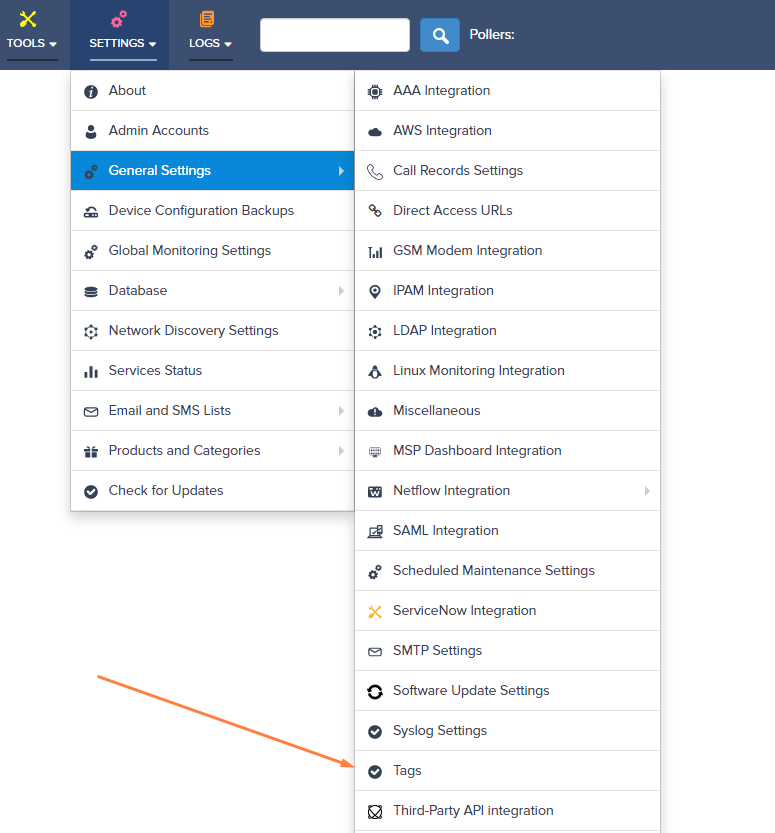
Step 1: Login to the Nectus portal with a valid credentials. Go to Settings -> General Settings -> Tags.
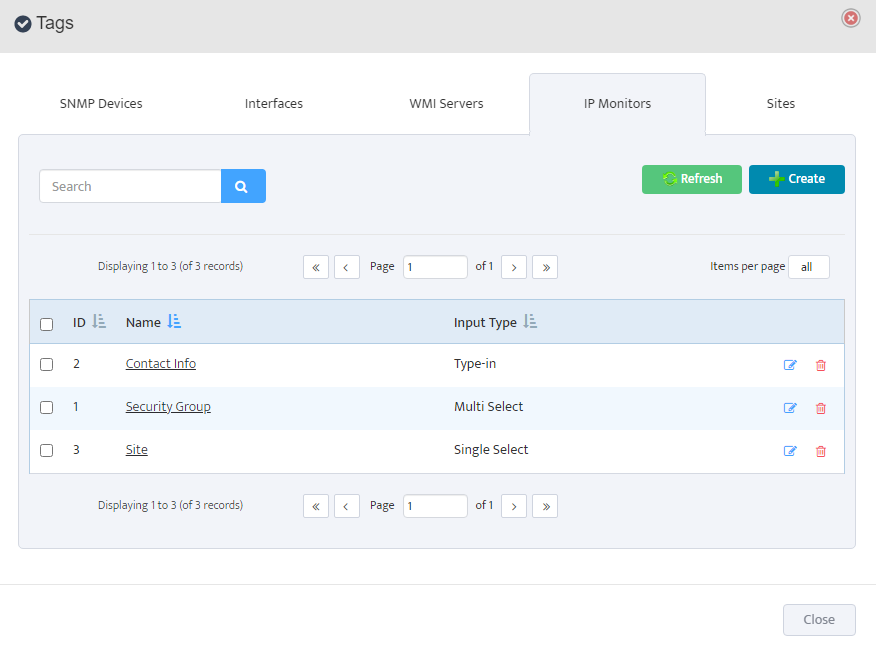
Step 2: After clicking the Tags option, it will open a Tags modal with five tabs – SNMP Devices, Interfaces, WMI Servers, IP Monitors, Sites.
In this article, we’ll choose the IP Monitors and create 3 tags.
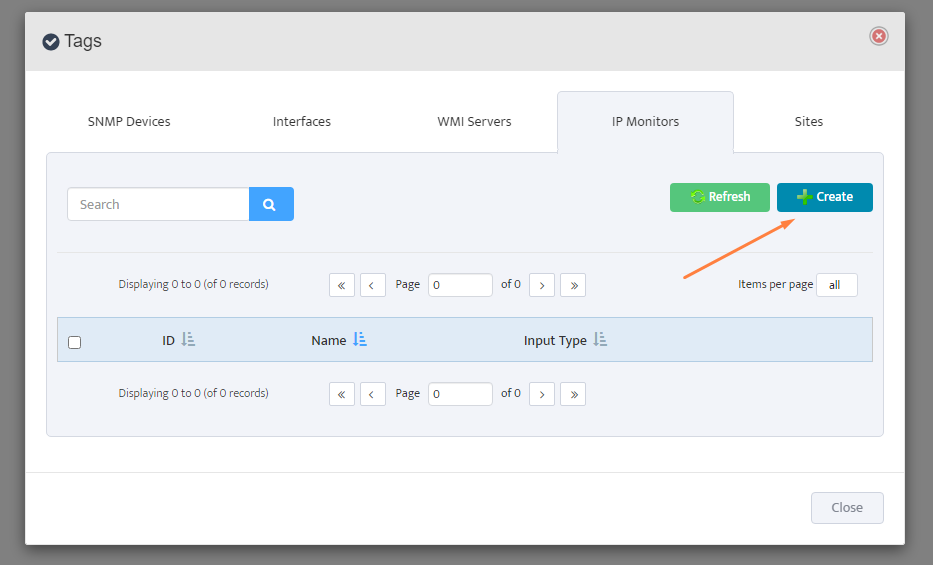
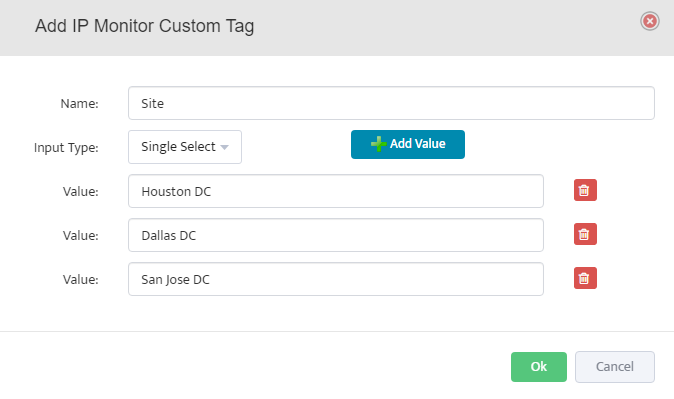
Step 3: After clicking the Create button, we’ll get the Add IP Monitor Custom Tag Modal. Provide name and pick the input type from available three options: Type-In, Single Select, Multi Select.
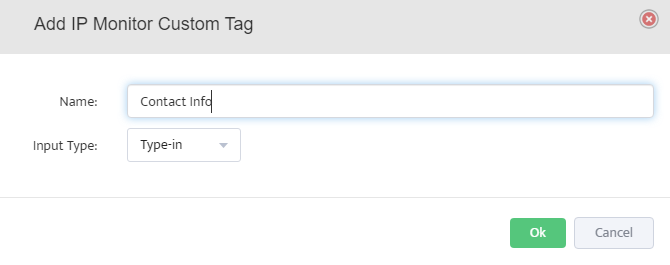
Step 3a: Type-in option allows the user to type the value of the tag as per their need in text form.
Step 3b: Single Select option allows the user select only one tag value at the time of assignment.
Step 3c: Multi Select option allows the user select one or more value at the time of assignment.
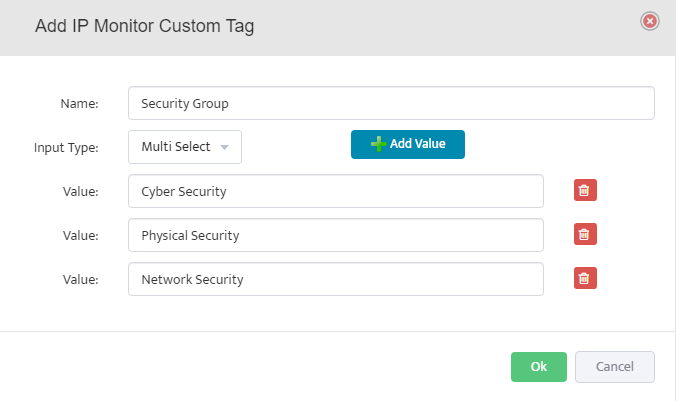
Step 4: Here, for the demo purposes, we had created 3 tags as shown below.
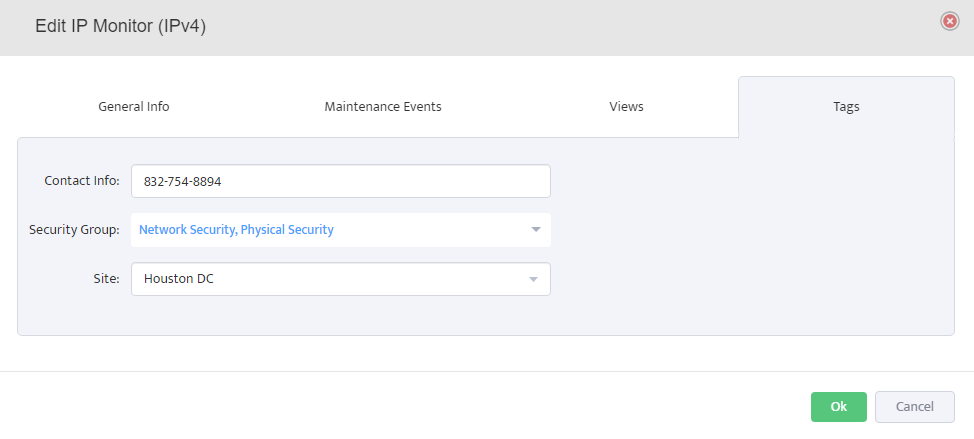
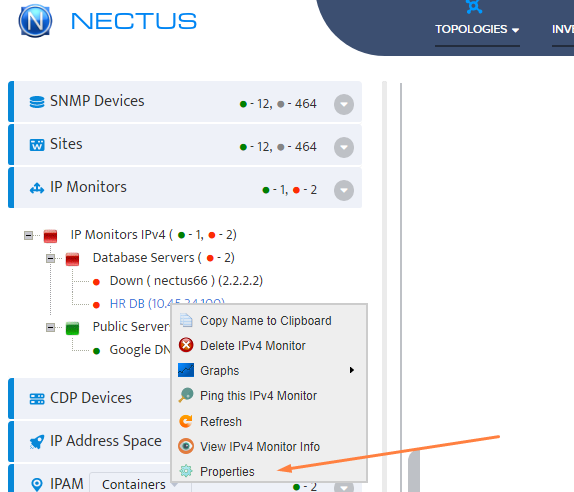
Step 5: Now, let’s define values for custom tags in the existing IP Monitor. Right-click on selected IP and go to the Properties.
Step 6: Select the Tags tab from the Edit IP Monitor modal and fill the Tags Values accordingly.