Adjusting min. detectable ICMP outage duration in Nectus

,

Adjusting Min. detectable ICMP outage duration in Nectus

When Nectus is configured to monitor UP/DOWN Status for network devices with ICMP it sends Echo packets at preset interval called Inter-Packet Delay.

By default, this Interval is set to 10 seconds.

Network Device is considered down if Echo-Reply is not received for “N” consecutive Echo packets.

By default “N” is set to 10.

So, by combining Inter-Packet Delay and “N” Value we can see that minimum duration of the outage that can be detected by Nectus with default settings is 100 seconds.

Sometimes when network a prone to fast transient outages or burstable traffic patterns that can impact ICMP it may be beneficial to increase minimum detectable ICMP outage duration to higher value. This can helps to eliminate alerts about short lived outages and only alert on outages that have more lasting impact.

To adjust Inter-Packet Delay or “N” Value go to “Monitoring -> Global Monitoring Settings


And adjust values on “ICMP Monitoring” Tab according to your business needs.


Monitoring HTTP URLs with Nectus NMS

,

Monitoring HTTP URLs with Nectus NMS

Have you ever been surprised to find out your website hadn’t been running or online?

Realtime status updates of your website can relieve you of the frustration of downtime and provide with instant alerts to your team.

Nectus HTTP Monitoring module can take the burden of URL monitoring away and provide real-time status of thousands of URLs, all using one quick view.

Nectus can poll websites on with preset frequency and alert you via Email or SMS if any of the websites are down.

Creating URL Groups in Nectus

HTTP URL Monitoring starts with creating URL Groups.

To create a URL group, right click on the Web Servers group on the left side panel. When the context menu appears, click on Add New Group.

After clicking Add New Group, a pop-up window appears.

Window allows you to set a Poll Frequency, which defined how often Nectus will poll your website.

Enable Monitoring can be checked to begin monitoring for all URLs that are members of this group.

Send Alerts to Email Group and Send Alerts to SMS Group can be checked to specify URL Down Alert recepients for Email or SMS notifications.

To modify members’ list of any of the existing E-mail or SMS groups click on the group name.

Once you click on the Alert group name a popup window appears where changes can be made to the existing alert groups.

Adding URLs to Groups in Nectus

After creating URL groups, you now may add URLs that you want to monitor to the group you have just created.

Right Click on any of the group name and select: Add New URL

After clicking Add New URL, you can add the URL and give the URL a specific name. You may also specify which group the URL goes into.

Once you have added the URL, monitoring start automatically.

Repeat this process for every URL you’d like to enable for monitoring.

After you have finished adding all of your URLs you will be able to quickly see the status of all the URLs in the left side panel.


Multiple Alert Email Aggregation in Nectus

,

Multiple Alert Email Aggregation in Nectus

Very often during site level power or network outages or during network maintenance multiple devices become offline at the same time causing multiple individual DOWN Email alerts to be sent at the same time.

Depending in the size of the site it can be well over hundreds or even thousands alert emails to be sent out to corresponding e-mail recipients configured for given site.

Starting from version 1.2.52 Nectus offers an option to aggregate multiple DOWN or UP email alerts into a single multi-device alert notification containing a list of all devices that became DOWN or UP within last monitoring interval.

To enable Alert Aggregation, go to Monitoring -> Global Monitoring Settings: “Alert” Tab

And Select “Aggregate multiple UP/DOWN Alerts” Option.


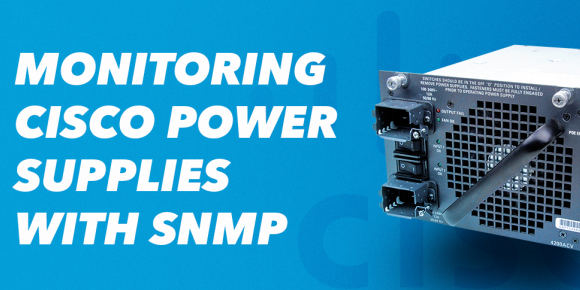
Monitoring Cisco Power Supplies with SNMP
,

Monitoring Cisco Power Supplies with SNMP

Cisco Power Supply

Cisco Power Supply

Step 1. Determine which SNMP OID to use

Very first step before you can start monitoring power supply status is to determine which SNMP OID is supported by specific router or switch type you want to monitor.

The main challenge here is that there is no consensus among manufacturers on specific SNMP OID and even within Cisco products OID can be different on different product lines.

Let’s take Cisco Catalyst 3750 series switches as an example.

For all Cisco 3700 series switches SNMP OID that contain power supply status is .1.3.6.1.4.1.9.9.13.1.5.1.3 (ciscoEnvMonSupplyState) from CISCO-ENVMON-MIB

Cisco TAC is usually a good resource to confirm which OID can be used for different Cisco product lines.


Step 2. Obtain Power Supply Index Values

Next step is to perform SNMP GET BULK or SNMP Walk query for selected OID (.1.3.6.1.4.1.9.9.13.1.5.1.3) against one of the switches that you planning to monitor to determine how many power supplies this specific switch model has and what are the index values for each power supply.

Sample GET Bulk Response from Cisco Catalyst 3750:

‘1.3.6.1.4.1.9.9.13.1.5.1.3.[1034]’ => “1”

‘1.3.6.1.4.1.9.9.13.1.5.1.3.[2034]’ => “1”

In this SNMP GET-BULK response we see that switch has two power supplies with indexes: 1034 and 2034.


Step 3. Obtain list of Status Values for SNMP OID

Last step before we can start monitoring power supply is to consult MIB for possible values that this specific OID can report for power supply status.

For SNMP OID 1.3.6.1.4.1.9.9.13.1.5.1.3 there are 6 possible status codes:

Normal (1), Warning (2), Critical (3), Shutdown (4), Not Present (5), Not Functioning (6)


Step 4. Create Custom SNMP Tracker for Each Power Supply

Now we are ready to create custom SNMP trackers for each of the power supplies.

In Nectus GUI go to Monitoring → SNMP Monitoring Settings → Custom SNMP Trackers

Press “Create” button to bring up Custom SNMP Tracer creation interface.

We will have to create two separate trackers, one for each power supply.

Complete tracker “General” settings Tab according to this

Note that for this tracker we created a device view called “Cisco Catalyst 3700 Switches” that contain all Cisco Catalyst 3700 Series switches that we want to monitor with this tracker.

If you want to enable Power supply monitoring for more switches later, you just need to add new switches to this Device View.

Select which email lists will be used as email Alert recipients.

In “Alerts” Tab we need to specify which status values will be considered Normal and which values should trigger Alerts. You can specify multiple values separated by comma.

Define an Alert Severity level for Alarm Values as Informational, Warning or Critical.

Define number of consecutive readings for which power supply status has to report an Alarm condition before formal Alert is created. Nectus performs one SNMP poll per 5 min.

So if you define value for consecutive readings as 3 it should result in Alert created after 15 minutes of True Alarm conditions.

Press “Save” to complete Custom SNMP tracker creation for Power Supply 1.

Repeat the same process for Power Supply 2.

Now you have created custom trackers that will be monitoring both power supplies on all Cisco Catalyst 3700 Switches in your network.


Using Subnet Profiles in Nectus IPAM

,

Using Subnet Profiles in Nectus IPAM

One of the unique features offered by Nectus is the ability to logically split each subnet into predefined ranges reserved for specific categories such as users, servers, infrastructure devices, etc. This is done with the help of subnet profiles. In Nectus, subnet profile is a set of IP ranges with a unique color code and a distinct name. Color coding makes it easier to locate an IP range reserved for a specific device type. This article explains how to create subnet profiles in Nectus.

  1. Creating a Subnet Profile

To create a new subnet profile, go to Main Menu and select Settings → General Settings → IPAM Integration.

In the “IPAM Integration” window that appears, select Subnet Profile tab and click Add button.

Begin defining a new subnet profile in the “Add Subnet Profile” GUI window that appears. Assign a name to your new profile. Define the first device category. Determine how many IP address you would like to reserve for the first device category and assign an order number for the first (Start) and the last (End) IP address in the group. Chose a color code for the device category.

Use + button to add additional device categories. Press Save to save your new profile.


2. Assigning Profile to a Subnet


To assign a profile to a subnet, right click on the selected subnet and select Properties.

On the “Properties” page that appears, select the desired profile and press Save button.


3. Benefits of Subnet Profiles

Once you have assigned a profile to a subnet, your subnet map will display color-coded IP ranges reserved for the device categories.

This visual guide will help you better manage IP addresses in the subnet.


Importing subnets to IPAM from IGP routing protocols explained.

,

When importing Subnets into IPAM from routing protocols Nectus apply following rules:

  1. Only subnets from IGRP routing protocols (EIGRP, OSPF, ISIS, RIP) are being considered for import.
  2. Nectus will not import subnets from iBGP  or eBGP.
  3. Nectus start importing subnets in the order from smallest to largest:  /32 ,   /31, then /30, then /29…etc.  This is done to give individual subnets priority over  summaries.
  4. Every imported subnet is validated against overlapping with existing subnets.
  5. Nectus will not import subnets that overlap with any of the existing subnets.
  6. Nectus will only import subnets that fall into defined IPAM address space.

Using Custom Subnet Tags in Nectus IPAM

,

Using Custom Subnet Tags in Nectus IPAM

One of the unique features of Nectus IPAM is ability to define unlimited number of properties aka “custom tags” and assign it to any of the subnets.

For example: “Building Floor”, “Datacenter” or “Application Name” can be defined for each subnet as a custom Tag.

To create a new custom tag go to Settings → General Setting → IPAM Integration

On “Subnet Tags” tab you will see current list of Tags that already exist in database.

To add a new tag press “+” button next to drop-down menu with all the tags.

Specify Tag name and press “Save” button

After you defined Tag’s name you can start adding specific Tag values for this Tag by pressing on “+ Add” button at the right upper corner of the page.

You can define as many Tag Value as required.

After you finished defining Tag values you can open Properties for any subnet in IPAM and you will see all the defined Tags as a drop-down menus where you can select specific Tag value for given subnet.


Creating DHCP Split Scopes in Nectus IPAM

Creating DHCP Split Scopes in Nectus IPAM

Nectus IPAM offers extensive DHCP integration features with one of the most important is ability to create and manage DHCP Scopes split across multiple DHCP Servers.

To create a new DHCP Split-Scope go to “Inventory → IPAM Subnets and Reservations”

Select “IPv4 DHCP Subnets” Tab and press “Add Subnets” button.

Specify basic Subnet info and select the DHCP Servers that will be serving IP addresses for this subnet. Define “Start” and “End” IP address for each selected DHCP Server.

In this example subnet 10.20.20.0/24 is split across two DHCP servers: PLUTO and NEON.

Server PLUTO is serving IP addresses from range: 10.20.20.1-10.20.20.200

Server NEON is serving IP addresses from range: 10.20.20.201-10.20.20.254

Always make sure that split-scope ranges don’t overlap to prevent duplicate IPs being leased.

Suppressing excessive E-mail alerts during site level network outages

,

When whole site power outage or network maintenance is in progress it is default behavior for Nectus to send individual DOWN alerts for each device in that site possibly resulting in hundreds of DOWN e-mail alerts followed by the same amount of UP e-mail alerts sent out to all configured alert recipients.

In version 1.2.53 Nectus introduced a feature that allows user to reduce number of alert e-mails during site level network outages to only specifically designated devices called “Gateways”

For each site user can designate some of the devices as “Gateways” and following alert rules will be applied:

  1. If all the Gateways in given site are DOWN, Nectus will not send DOWN alerts for regular devices located in the same site.
  2. If at least one Gateway in given site is still UP then Nectus will send individual DOWN alerts for all of the devices detected as DOWN.
  3. If all the Gateways in given site recovered from DOWN to UP, Nectus will not send UP alerts for regular devices located in the same site.
  4. If at least one Gateway in given site is still DOWN then Nectus will send individual UP alerts for all of the devices detected as UP.

To configure Site Gateways right click on Site and select Properties

Press “Site Gateways” Button

Select devices that you want to be gateways for given site and press Save button