Monitoring Cisco Power Supplies with SNMP
Monitoring Cisco Power Supplies with SNMP
Cisco Power Supply
Step 1. Determine which SNMP OID to use
Very first step before you can start monitoring power supply status is to determine which SNMP OID is supported by specific router or switch type you want to monitor.
The main challenge here is that there is no consensus among manufacturers on specific SNMP OID and even within Cisco products OID can be different on different product lines.
Let’s take Cisco Catalyst 3750 series switches as an example.
For all Cisco 3700 series switches SNMP OID that contain power supply status is .1.3.6.1.4.1.9.9.13.1.5.1.3 (ciscoEnvMonSupplyState) from CISCO-ENVMON-MIB
Cisco TAC is usually a good resource to confirm which OID can be used for different Cisco product lines.
Step 2. Obtain Power Supply Index Values
Next step is to perform SNMP GET BULK or SNMP Walk query for selected OID (.1.3.6.1.4.1.9.9.13.1.5.1.3) against one of the switches that you planning to monitor to determine how many power supplies this specific switch model has and what are the index values for each power supply.
Sample GET Bulk Response from Cisco Catalyst 3750:
‘1.3.6.1.4.1.9.9.13.1.5.1.3.[1034]’ => “1”
‘1.3.6.1.4.1.9.9.13.1.5.1.3.[2034]’ => “1”
In this SNMP GET-BULK response we see that switch has two power supplies with indexes: 1034 and 2034.
Step 3. Obtain list of Status Values for SNMP OID
Last step before we can start monitoring power supply is to consult MIB for possible values that this specific OID can report for power supply status.
For SNMP OID 1.3.6.1.4.1.9.9.13.1.5.1.3 there are 6 possible status codes:
Normal (1), Warning (2), Critical (3), Shutdown (4), Not Present (5), Not Functioning (6)
Step 4. Create Custom SNMP Tracker for Each Power Supply
Now we are ready to create custom SNMP trackers for each of the power supplies.
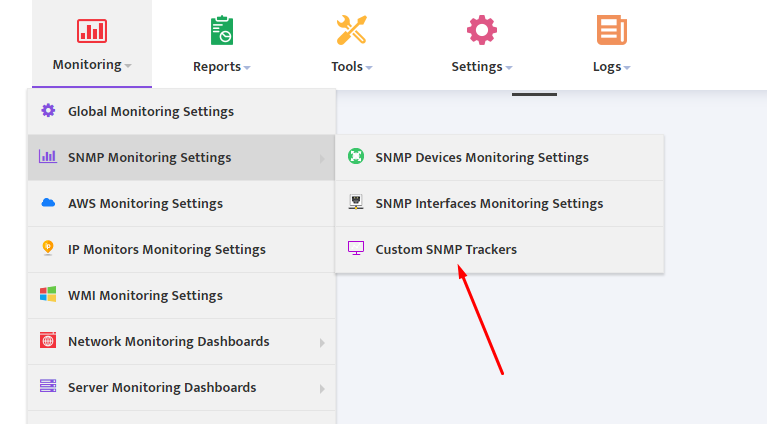
In Nectus GUI go to Monitoring → SNMP Monitoring Settings → Custom SNMP Trackers
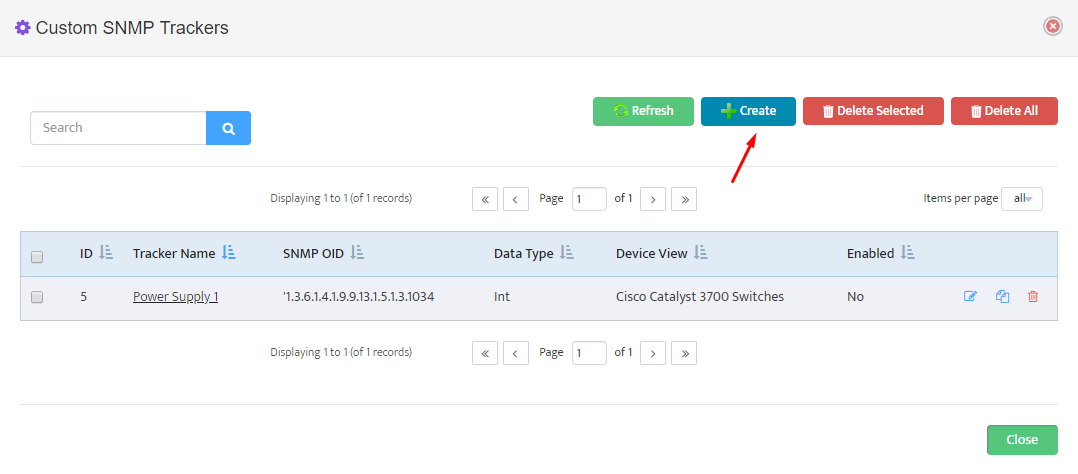
Press “Create” button to bring up Custom SNMP Tracer creation interface.
We will have to create two separate trackers, one for each power supply.
Complete tracker “General” settings Tab according to this
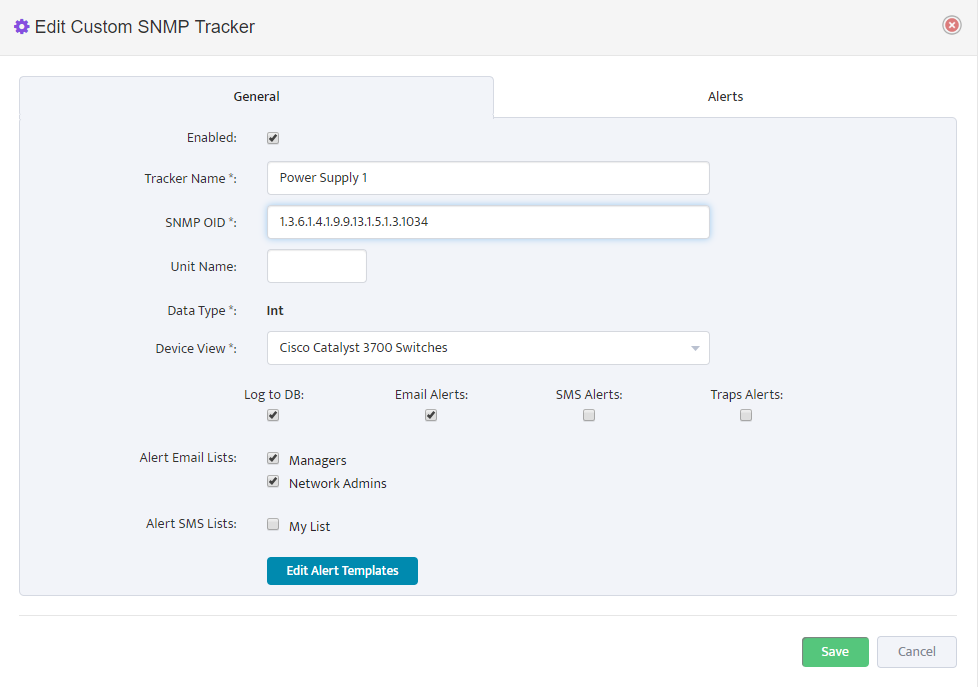
Note that for this tracker we created a device view called “Cisco Catalyst 3700 Switches” that contain all Cisco Catalyst 3700 Series switches that we want to monitor with this tracker.
If you want to enable Power supply monitoring for more switches later, you just need to add new switches to this Device View.
Select which email lists will be used as email Alert recipients.
In “Alerts” Tab we need to specify which status values will be considered Normal and which values should trigger Alerts. You can specify multiple values separated by comma.
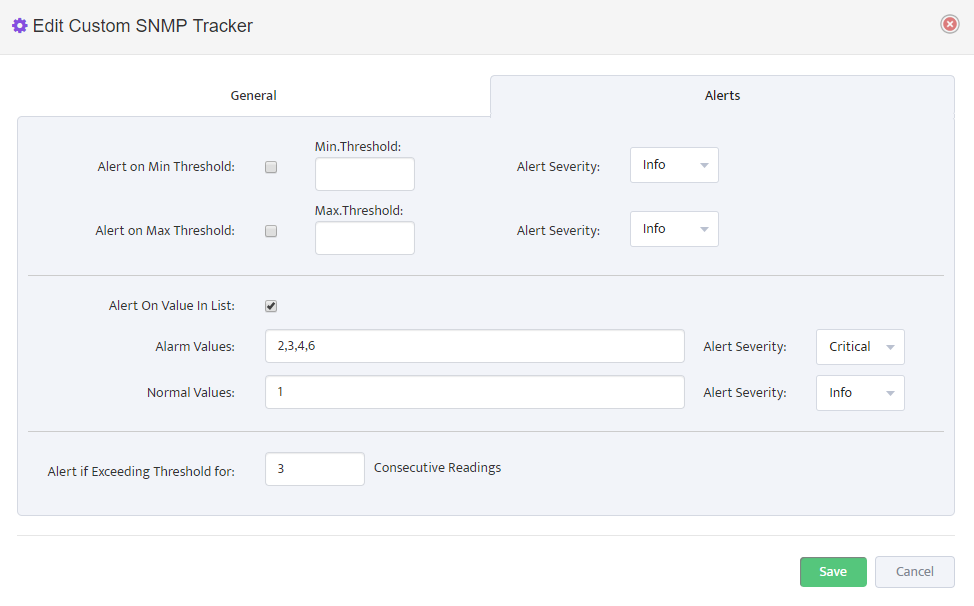
Define an Alert Severity level for Alarm Values as Informational, Warning or Critical.
Define number of consecutive readings for which power supply status has to report an Alarm condition before formal Alert is created. Nectus performs one SNMP poll per 5 min.
So if you define value for consecutive readings as 3 it should result in Alert created after 15 minutes of True Alarm conditions.
Press “Save” to complete Custom SNMP tracker creation for Power Supply 1.
Repeat the same process for Power Supply 2.
Now you have created custom trackers that will be monitoring both power supplies on all Cisco Catalyst 3700 Switches in your network.