Using Subnet Profiles in Nectus IPAM
Using Subnet Profiles in Nectus IPAM
One of the unique features offered by Nectus is the ability to logically split each subnet into predefined ranges reserved for specific categories such as users, servers, infrastructure devices, etc. This is done with the help of subnet profiles. In Nectus, subnet profile is a set of IP ranges with a unique color code and a distinct name. Color coding makes it easier to locate an IP range reserved for a specific device type. This article explains how to create subnet profiles in Nectus.
- Creating a Subnet Profile
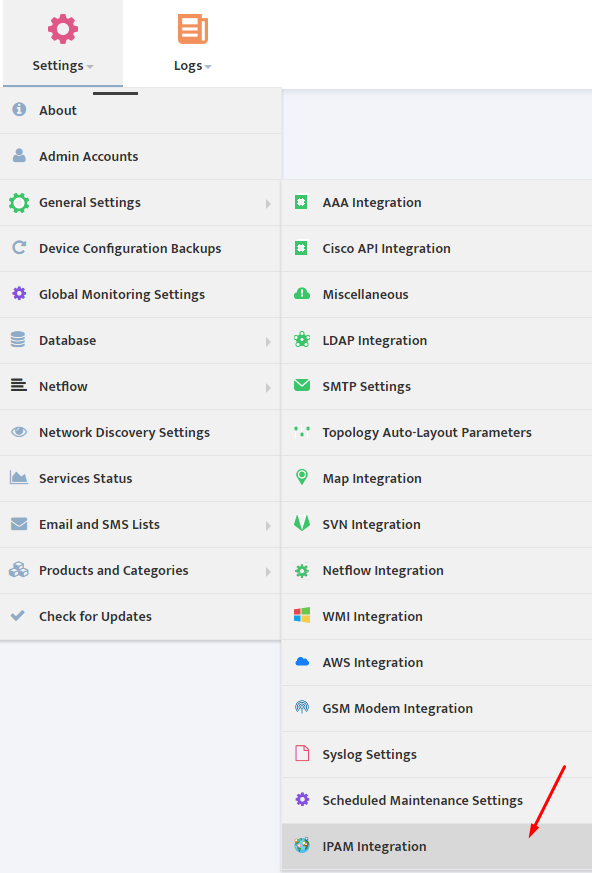
To create a new subnet profile, go to Main Menu and select Settings → General Settings → IPAM Integration.
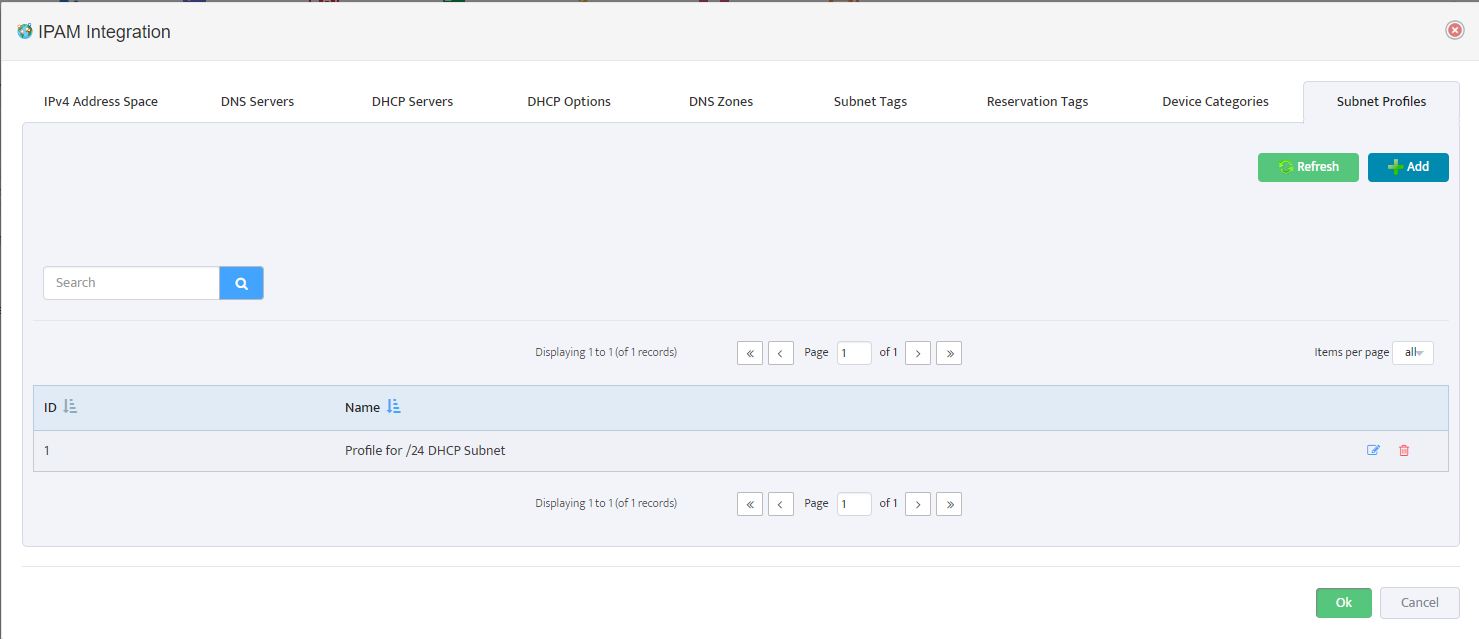
In the “IPAM Integration” window that appears, select Subnet Profile tab and click Add button.
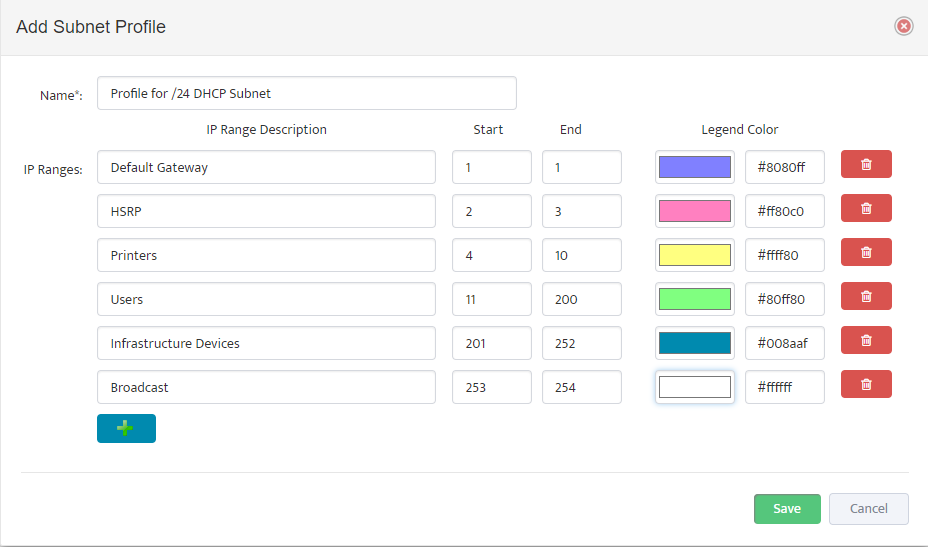
Begin defining a new subnet profile in the “Add Subnet Profile” GUI window that appears. Assign a name to your new profile. Define the first device category. Determine how many IP address you would like to reserve for the first device category and assign an order number for the first (Start) and the last (End) IP address in the group. Chose a color code for the device category.
Use + button to add additional device categories. Press Save to save your new profile.
2. Assigning Profile to a Subnet
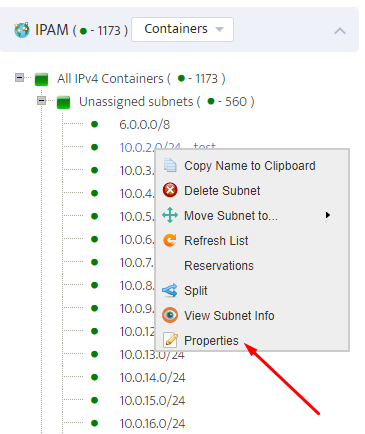
To assign a profile to a subnet, right click on the selected subnet and select Properties.
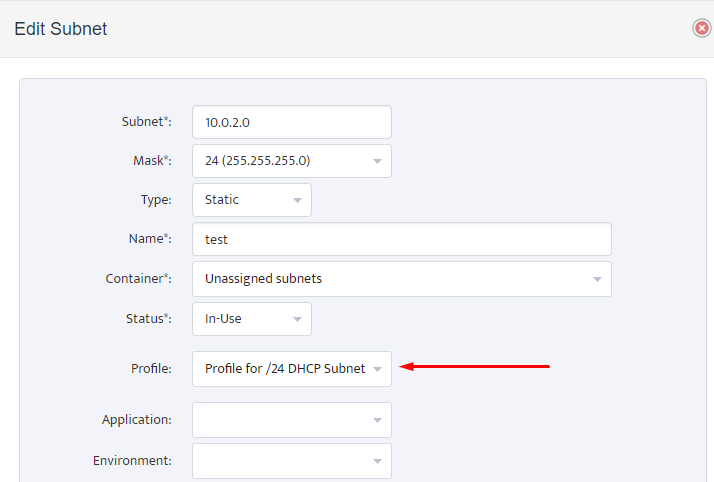
On the “Properties” page that appears, select the desired profile and press Save button.
3. Benefits of Subnet Profiles
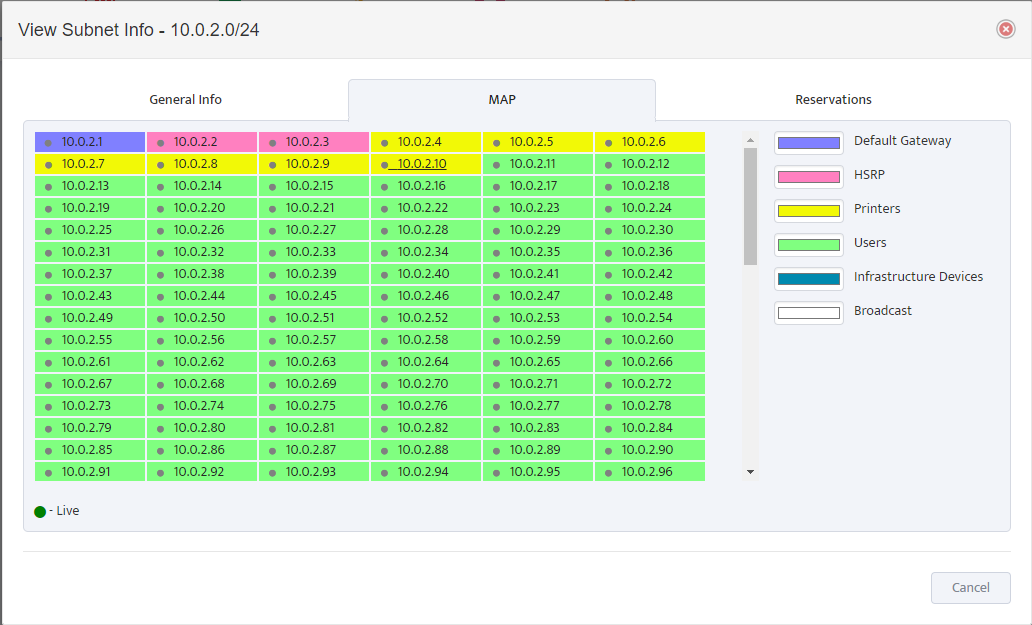
Once you have assigned a profile to a subnet, your subnet map will display color-coded IP ranges reserved for the device categories.
This visual guide will help you better manage IP addresses in the subnet.