Creating User Accounts and User Groups
Creating User Accounts and User Groups
In this chapter, you’ll learn how to create User Accounts and assign them to User Groups. You’ll also learn how to create User Groups and set their Access Rights.
The specific topics we will cover in this chapter are:
- Creating User Accounts
- Creating User Groups
- Setting User Group Access Rights
1. Creating User Accounts
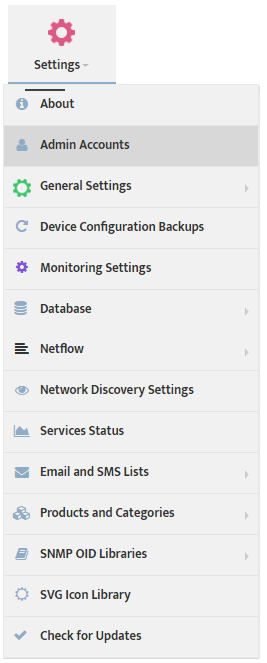
Every Administrator should have their own User Account. To create a new User Account go to the Nectus Home Screen and select Settings -> Admin Accounts.
This opens the “Admin Accounts” dialog box.
Select the User List tab and click Add New Account to open the “Add Account” dialog box.
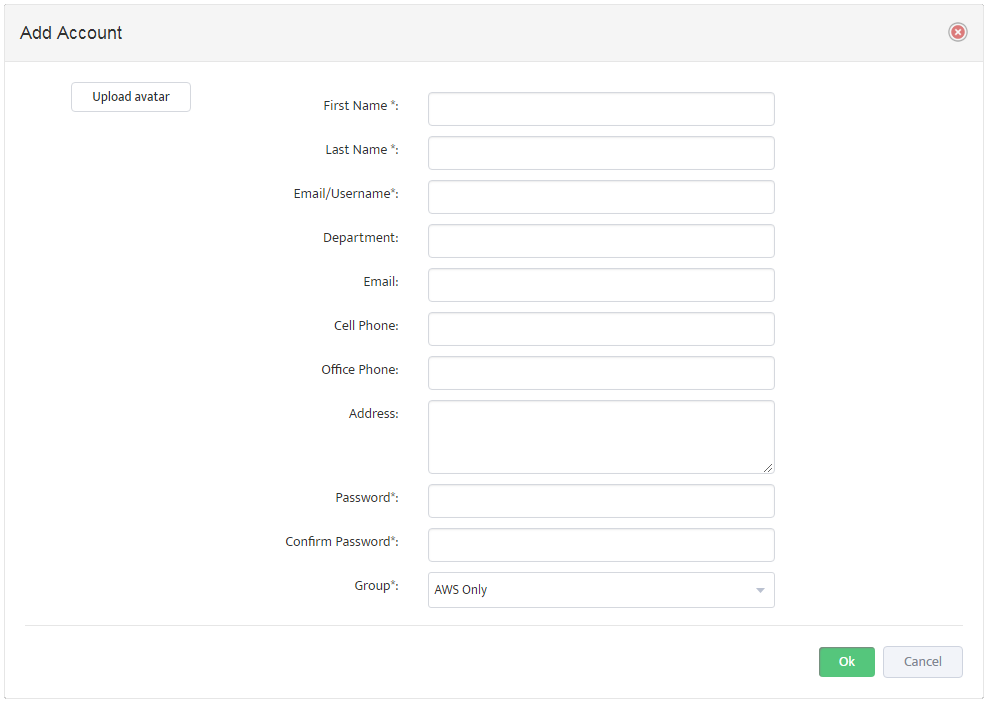
Enter the information for the user. Fields marked with an asterisk ( * ) are required. The group you assign determines the User’s Access Rights. You can assign the User to an existing Group, or create a new Group.
2. Creating User Groups
To create a User Group return to the “Admin Accounts” dialog box and select the User Groups tab.
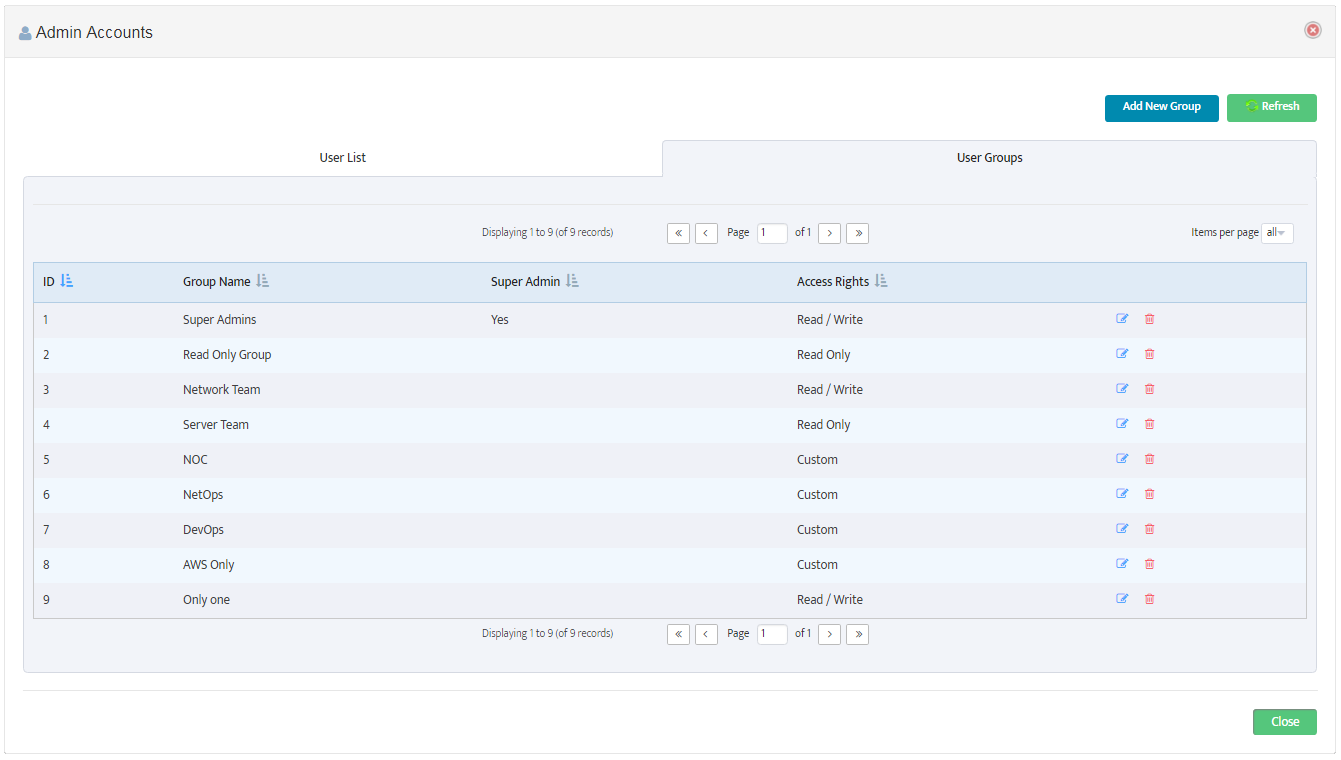
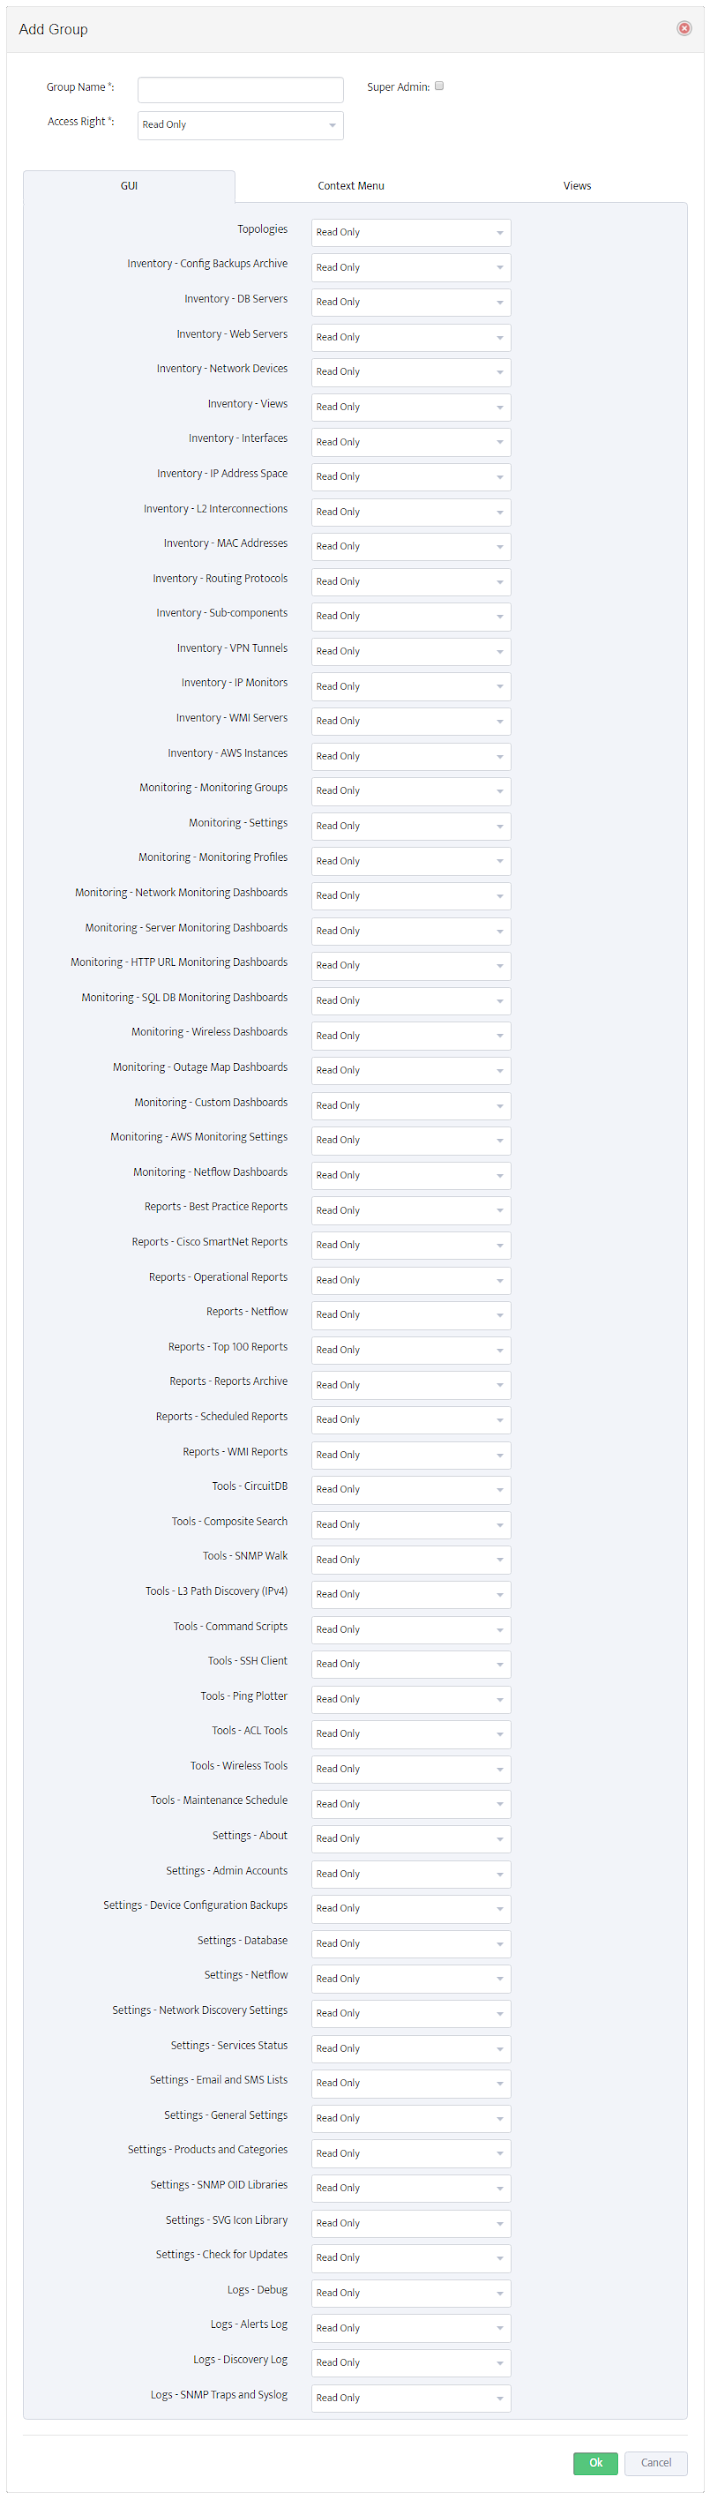
Click Add New Group to open the “Add Group” dialog box and enter a Group Name.
Note that you can use the icons to the right of the Group Names to edit or delete an existing User Group.
3. Setting User Group Access Rights
Select the Group’s Access Rights from the drop-down list. Selecting “Read Only” or “Read / Write” rights sets all the GUI and Context Menu options to those values.
Selecting “Custom” rights allows you to set each GUI and Context Menu item individually. The options are “Read Only”, “Read / Write”, and “Hide”.
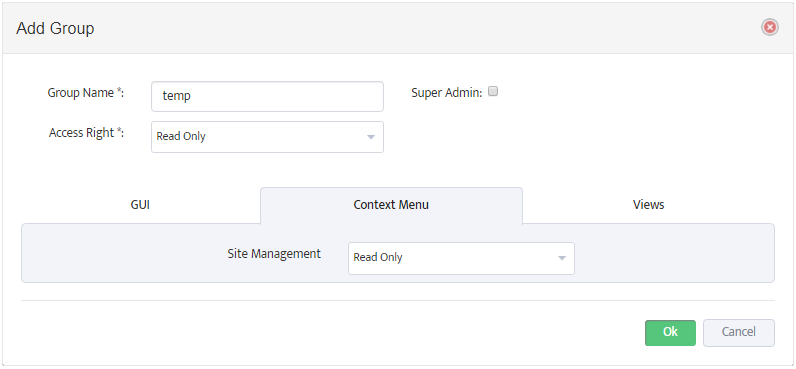
Select the Views tab to specify which views the User can see.
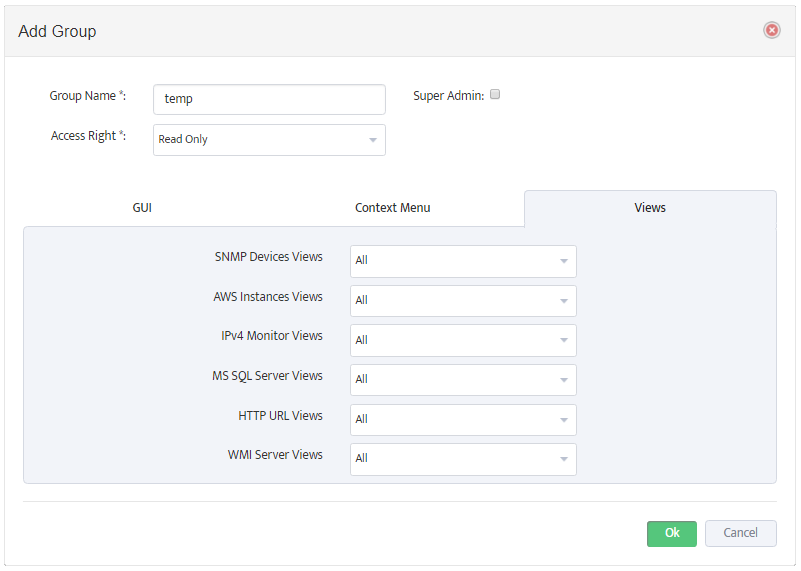
The drop-down list next to each view lists the items that will appear for that view. Setting “SNMP Devices Views” to “Cisco” for example causes only Cisco devices to appear in the SNMP Devices section or the Sites Section.
You can also designate the User Group as a “Super Admin.” Your installation must always have at least one Super Admin Group to ensure that Users have access to the system.