How to Manually Generate a Process Dump using Process Explorer
Problem
There may be times where a process dump file (or files) are required to troubleshoot a specific problem. The steps in this document walk through the process of generating a dump file using Process Explorer for IBM Support analysis. While the example used covers the tm1sd.exe process, the same steps can be followed for any process on the operating system. NOTE: You may follow a very similar approach using only Windows Task Manager, however Windows Task Manager will not allow you to choose a dump file location. This step is important if your application consumes a lot of memory and you do not have enough disk space on your Windows drive (C:).
Resolving The Problem
- Download Process Explorer
- Locate your Process Explorer executable, procexp64.exe.
- Right-click the process and select run as an Administrator.
- When Process Explorer has opened, look for the process/executable name in the Process column.
- If more than one process with the same process/executable name exists, hover over the executable and review the Services parameter and confirm that the details match what you are expecting.
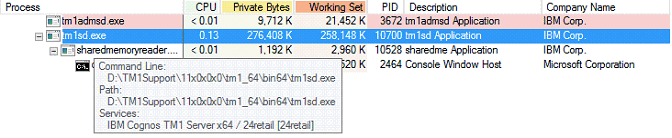
- If more than one process with the same process/executable name exists, hover over the executable and review the Services parameter and confirm that the details match what you are expecting.
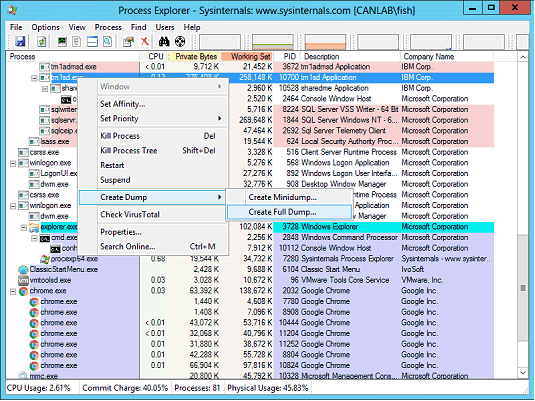
- Once the correct process has been found, right-click the process and select Create Dump > Create Full Dump
- When prompted, specify the directory where you wish to write the dump file to.
- Ensure that the disk you are writing to has enough space to write the file.
- The file will be close to the size of the memory used by the process.
- After you click the Save button, it can take a few minutes for the file to finish writing to disk.
- During this time the process will freeze until the dump has been written.
- The resulting dump file should be compressed and provided to IBM Support for review.