Using Custom SNMP Trackers in Nectus
Using Custom SNMP Trackers in Nectus
Nectus offers extensive SNMP based network monitoring capabilities that allow users to track any metrics accessible via SNMP.
In addition to standard metrics, such as CPU, RAM or TCAM utilization, Nectus offers a new feature called “Custom SNMP Tracker” that allows you to monitor virtually any metrics accessible via SNMP.
This article will guide you through the basic steps required for setting up custom SNMP trackers in Nectus.
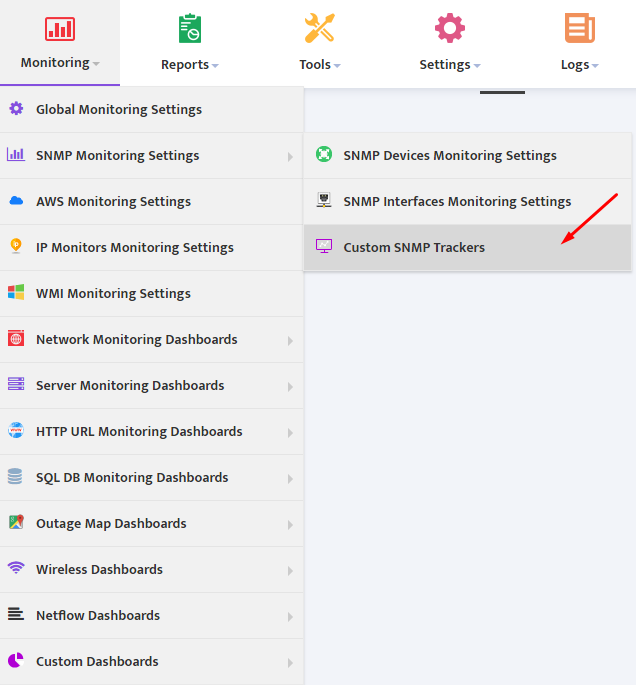
In the Main Menu, go to Monitoring → SNMP Monitoring Settings → Custom SNMP Trackers.
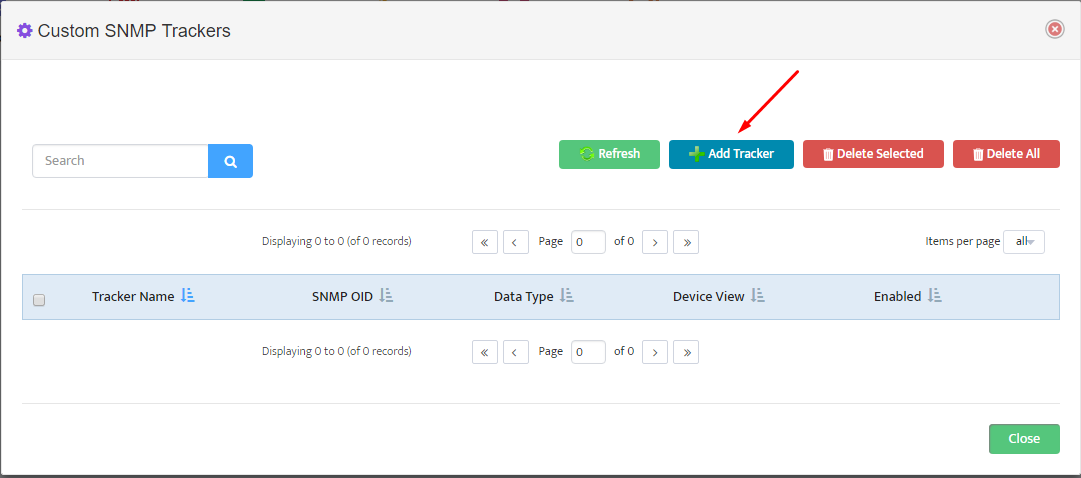
This opens a “Custom SNMP Trackers” window. To create a new custom SNMP Tracker, click the Add Tracker button.
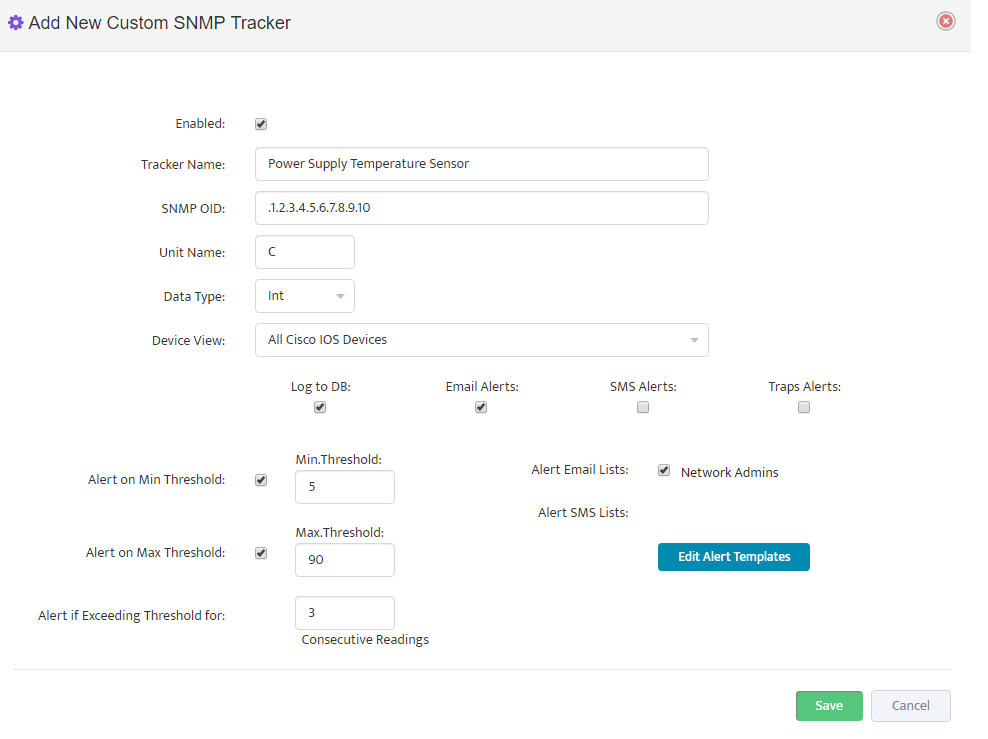
In the “Add New Custom SNMP Tracker” interface box that appears, specify the following parameters:
- Tracker name (Example: “Power Supply Temperature Sensor”)
- SNMP OID to be used with “SNMP GET” request for Data
- Unit Name (Example: C for Temperature)
- Data Type (Integer or Floating)
- The Device View that contains list of devices to be used for collecting data from
- Select “Log to DB” if you would like to save metrics values to a database every 5 minutes
- Select “Email Alerts” if you would like to be alerted when metrics exceeds pre-defined thresholds
- Min and Max Threshold Values
- Select the number of “Consecutive Readings” exceeding threshold that would trigger an alert
- Select one of the existing email lists/groups to receive the alerts (Example: “Network Admins”).
- Click Edit Alert Templates to fully customize the alert email for the metric
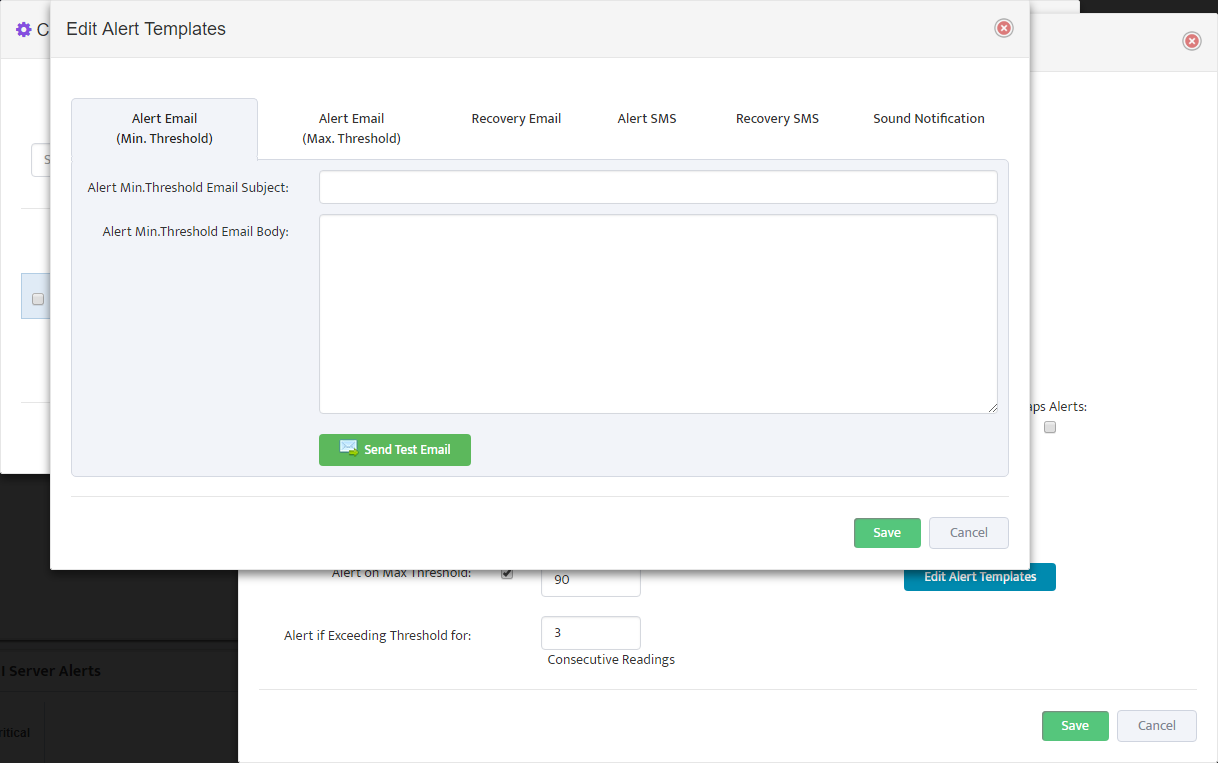
Customize the E-mail template for Alert and for Recovery event when Metric value returns to normal range.
You have now created your first custom SNMP tracker. To create additional trackers, use “Clone” feature to create and edit a copy of an existing tracker available from the “Custom SNMP Trackers” page.