How to use Nectus API Interface
How to use Nectus API Interface
Quick Start Guide
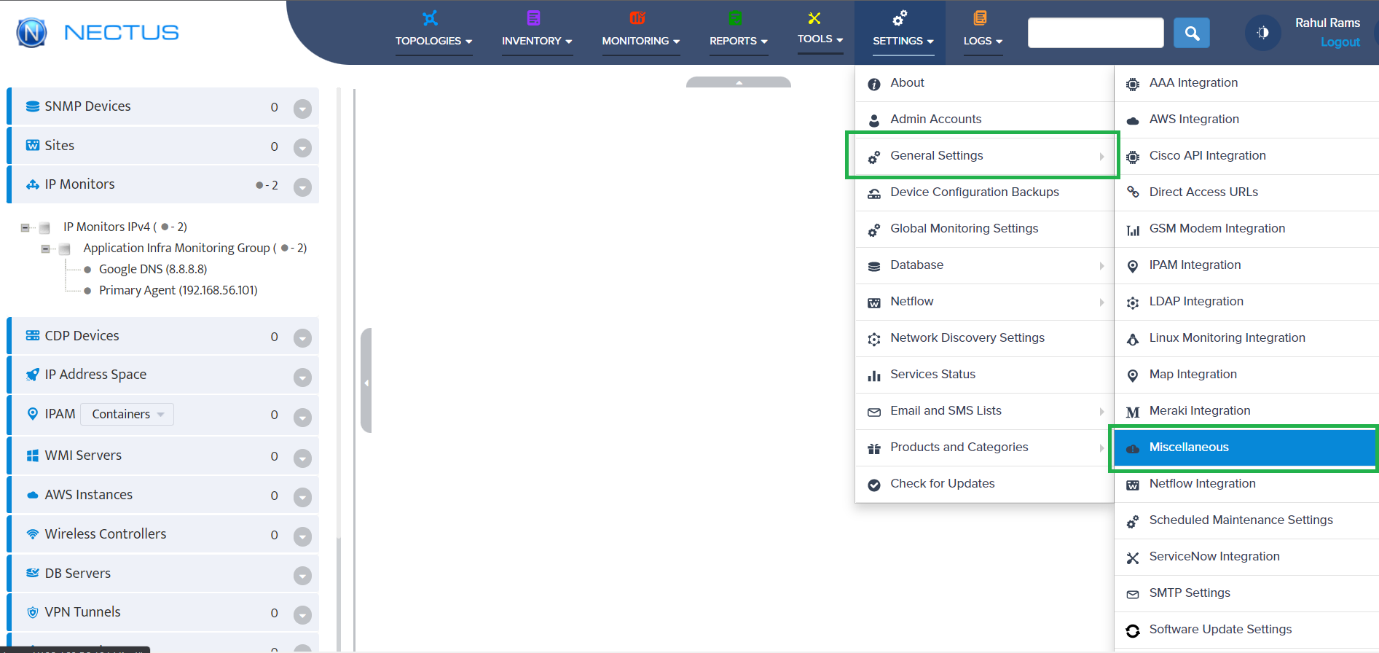
Step 1: Log in to Nectus Portal. On the home page, select General Settings -> Miscellaneous.
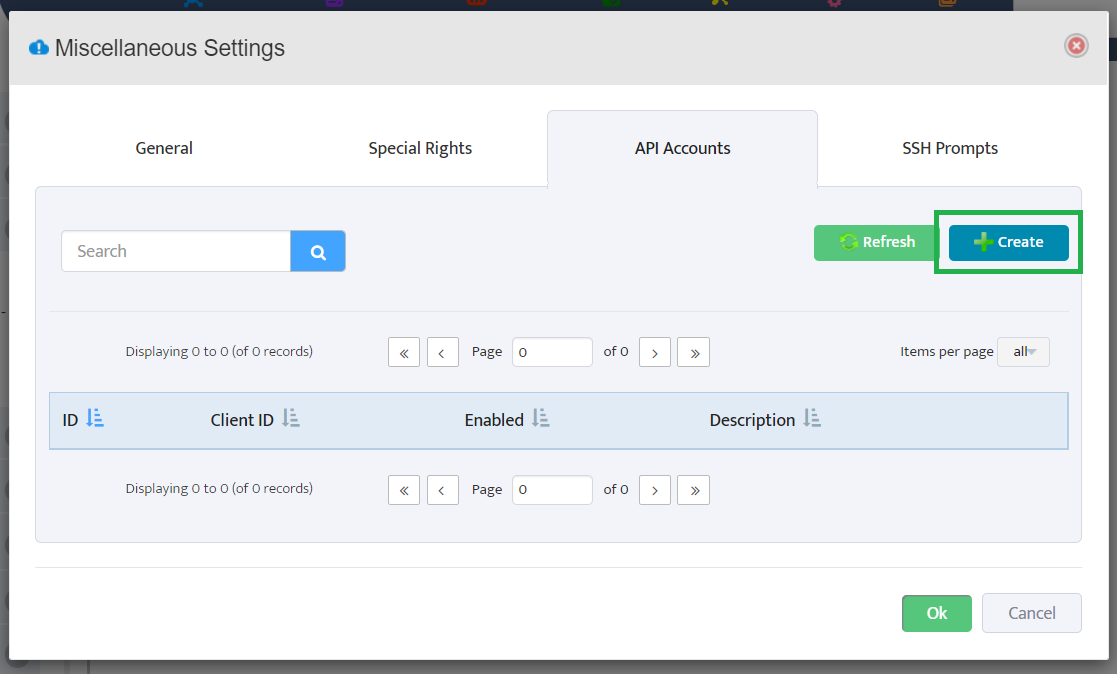
Step 2: Next, we have to generate a new client ID and client secret for creating the token. Go to API Accounts and click on Create.
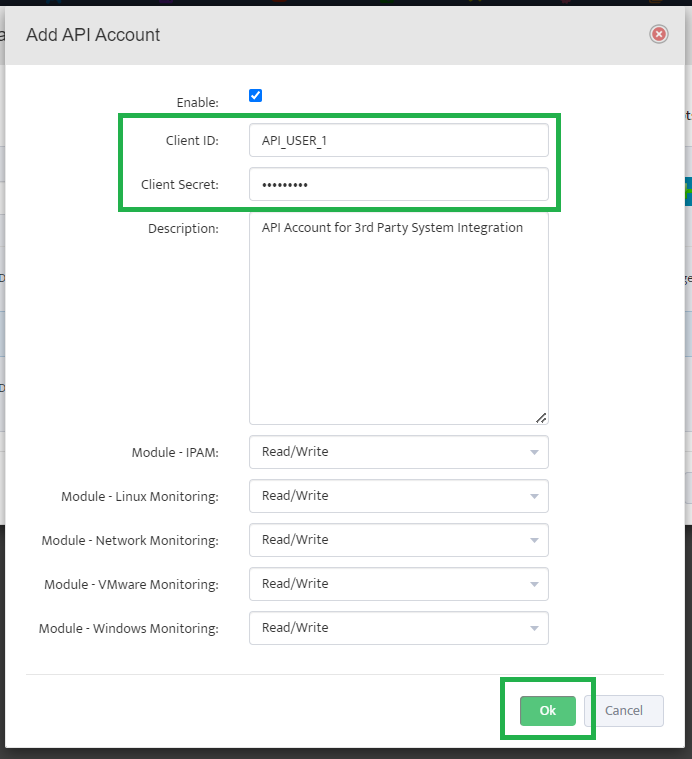
Step 3: Check the Enable box, enter the Client ID & Secret in the text box, and select the necessary access level (Read-Write or Read-Only) for the modules.
Here, we have given the Client ID as API_USER_1 and Client Secret as Nectus123. Click on the Ok button to create it.
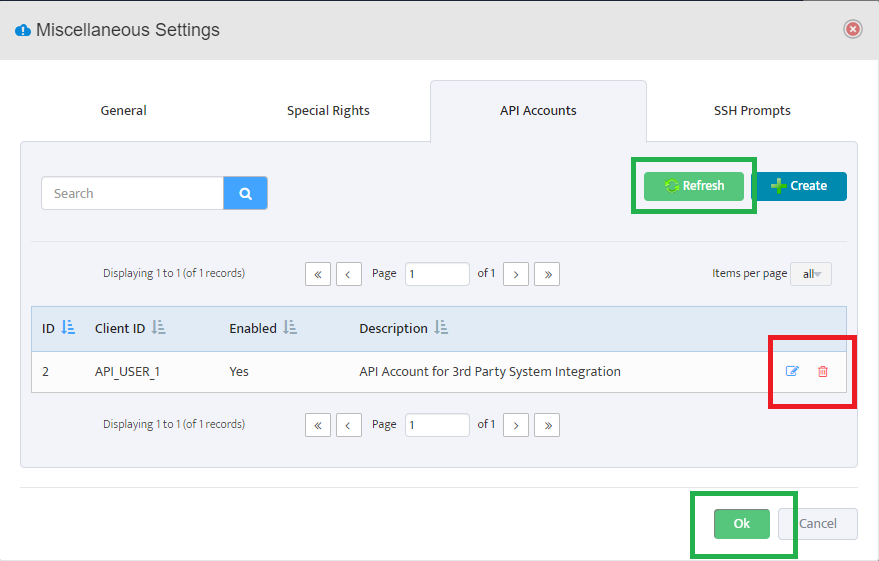
Step 4: Each API Account with the Client’s information obtains a unique ID and gets listed.
We also have the Edit button to modify and the Delete button to remove the existing accounts with ID. Click on the Ok button to close the miscellaneous modal.
Step 5: Now, we have to create the API token with the help of the generated Client ID & Client Secret.
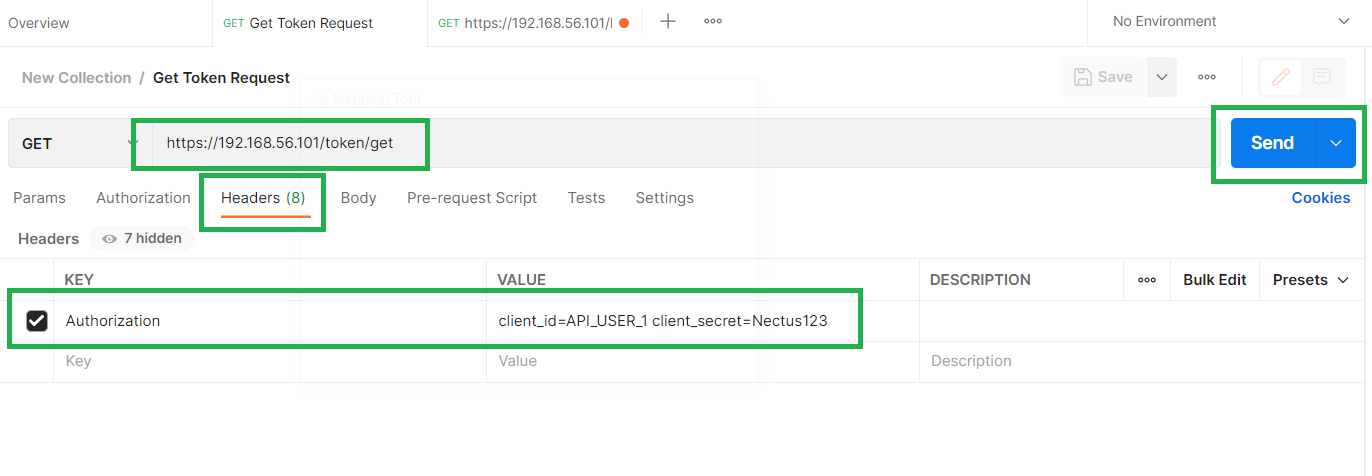
Here, we are using the POSTMAN Application for the sake of the demo. Use the below query and headers to get the access token.
API URL: https://<servername>/token/get
Request Type: GET
Headers: Authorization – client_id=API_USER_1 client_secret=Nectus123
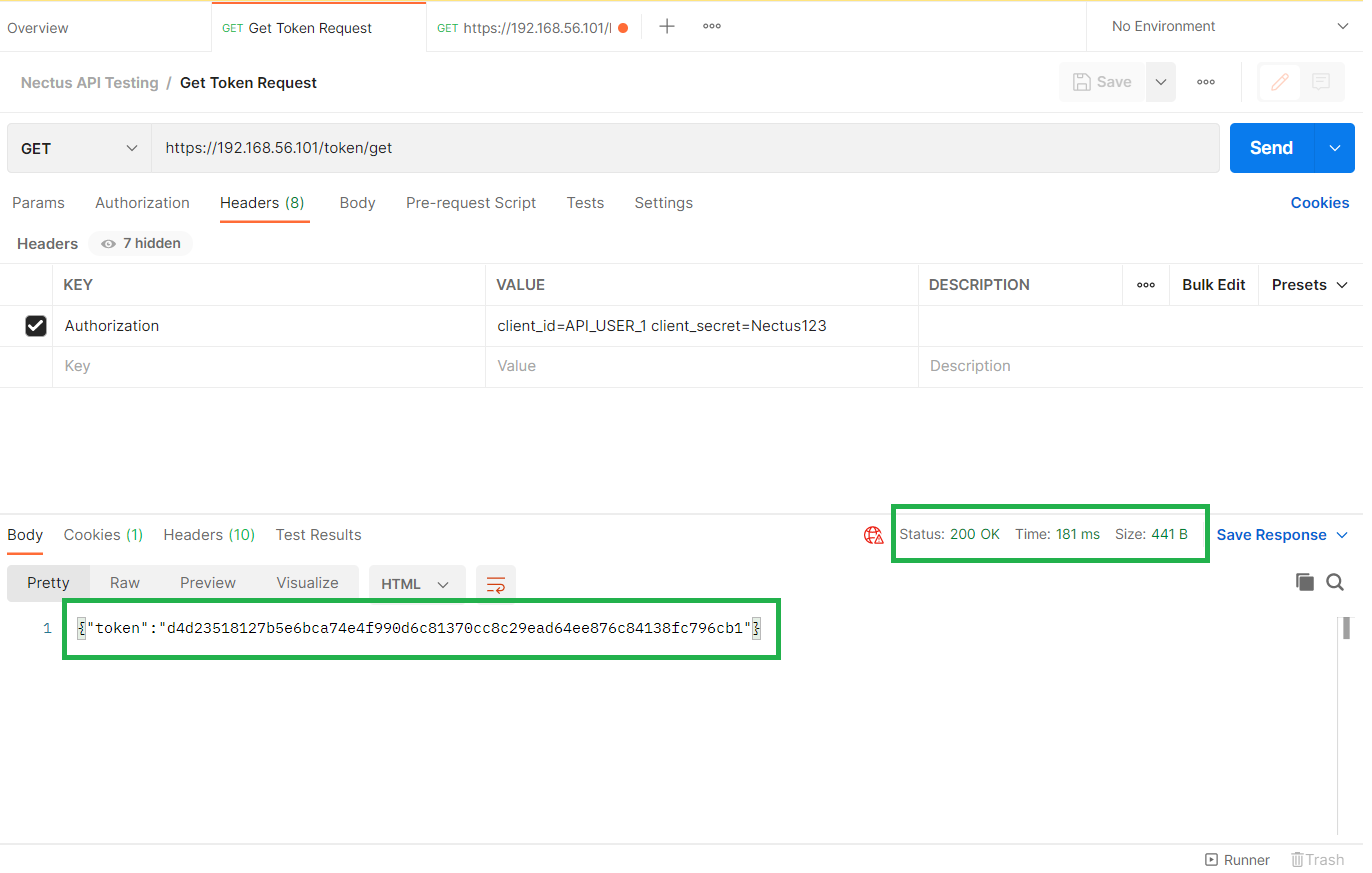
Step 6: Click the Send button to obtain the Status Code with 200 Ok with the token details in the response body.
Step 7: Now, we can use the generated access token for all Nectus API’s.
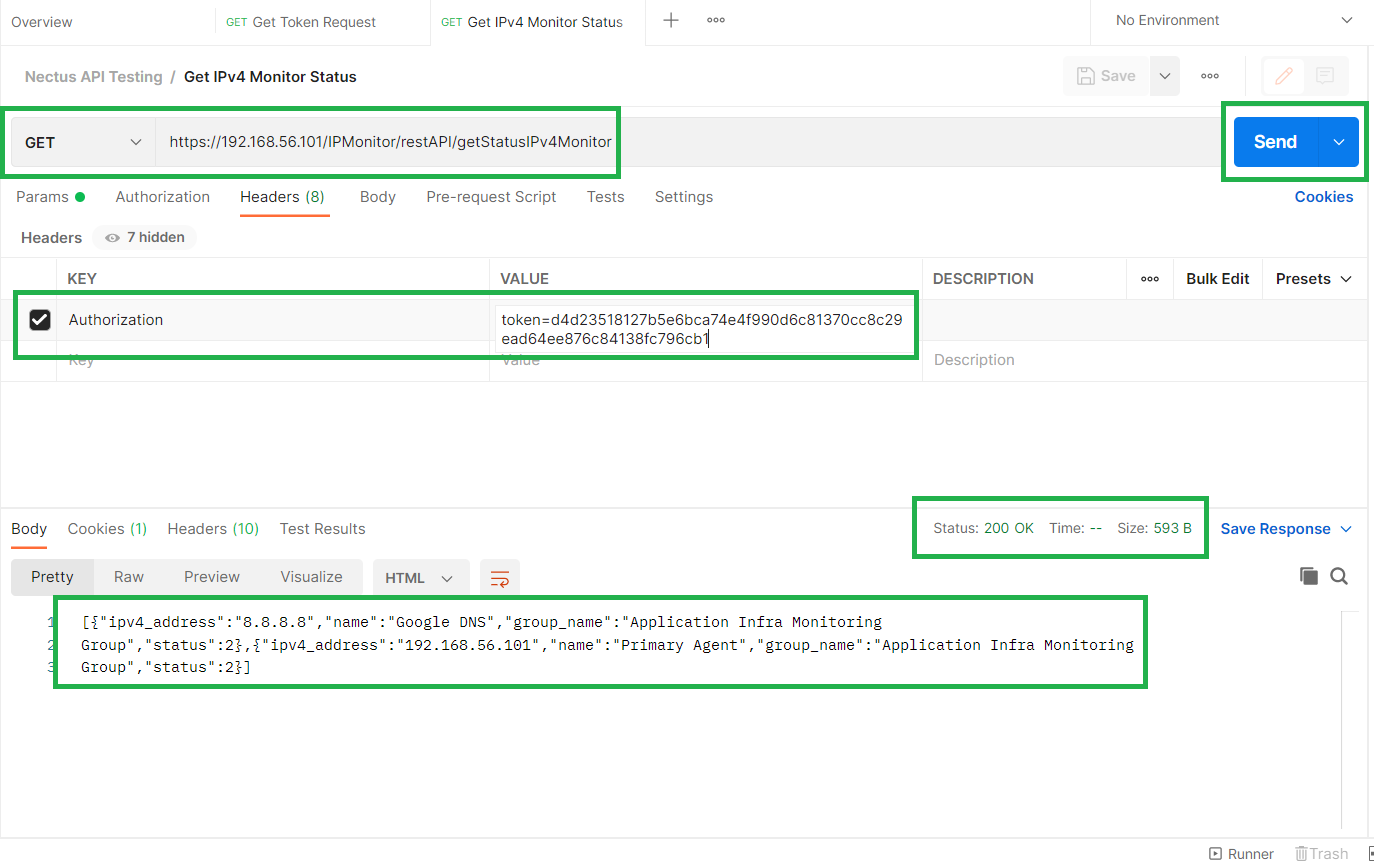
Let’s try with some API Request.
API URL: https://<servername>/IPMonitor/restAPI/getStatusIPv4Monitor
Request Type: GET
Headers: Authorization – token=<generated-access-token>
After clicking the Send button, we obtain the list of IPv4Monitor groups with the associated IP address and status.
Congrats! We have successfully used the Nectus API interface to access the monitoring data points which will ease the third-party integration with other systems.